
Winter is coming and for many boats, this is a period of inactivity. However, during this hostile period, your boat may be a little shaken. To avoid all eventualities, it is good to remember some basic rules in order to successfully dock.
1 – Keep Your Mooring Lines in Good Shape
It seems obvious, but you just have to walk on the marinas to notice the number of dock lines in bad or very bad shape. A mooring that breaks during the storm can have disastrous consequences for your boat, but also for others. What’s more, if the insurance considers that the mooring was in bad shape at the time of the peril of the sea, you can say goodbye to your refund.
2 – Well Attached Cleats
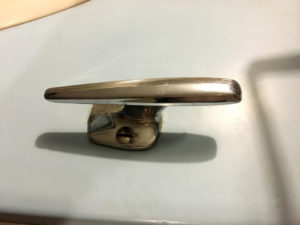
As for mooring lines, the cleats must be properly attached to the boat with the screws in good shape and tightly screwed, but also on a solid part of the boat. If this is not the case, they can be ripped off the boat with the consequences that come with it.
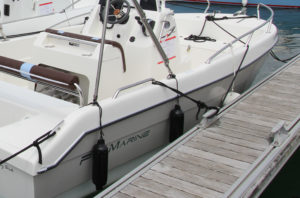
3 – Fenders Adapted and Well Placed
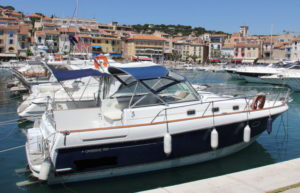
A fender is only useful if its size is proportionate and it is well placed. If it is too small, the fender will not protect anything; too big, and it may interfere with the mooring or even detach from its location and it will finish on the dock or on the catway and no longer protect anything.
Also, be sure to attach the fender to the correct height of that of the strake. You have to place at least one fender at the widest point of the boat and others at areas that may touch the catway or another boat. You can even set one on the bow if you are afraid of it being too close to the dock.
The Lines

4 – The Bow Lines
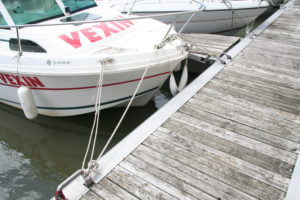
Attached between the front cleat of the boat and the dock on each side of the boat, the bow lines keep the bow in place and also prevent the boat from moving back from the dock.
5 – The Stern Lines
Attached between the rear cleat of the boat and the dock, the stern line keeps the rear in place and also prevents the boat from moving towards the dock.
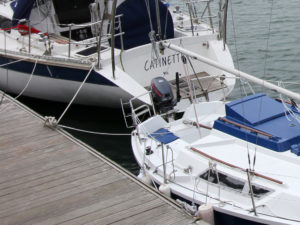
6 – The Rear Spring Line
A mooring connects the farthest cleat from the catway to a cleat on the front of the boat. It prevents the boat from moving towards the dock.
7 – The Front Spring Line (or downward spring)
It is attached from the mooring bollard on the dock on the front of the boat to the rear cleat of the boat. The front spring prevents the boat from moving backwards. If necessary, one can be installed on each side of the boat to provide additional lateral support.
8 – The Breast Line
The breast line connects the boat to the dock and keeps the boat close to the dock. This is where the placement of fender takes on all its importance. This also allows the boat not to move away from the dock in windy conditions and this facilitates boarding.
Tying knots
9 – Three Tying Knots to Know
You do not have to know all the knots to tie up a boat, but here are the three most important knots to know.
– The Square Knot
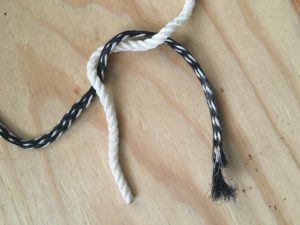
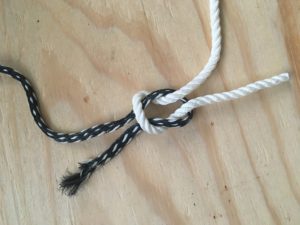
The square knot is used to tie two lines together. It is better if the two lines have the same diameter and it’s pretty easy to make. Make two overhand knots, but reverse the crossing when you tie the second overhand knot.
– The Half-Hitch

The half-hitch is perfect for stopping a dead turn or to dead end a line. It is made at the end of the dead turn by making a turn with the end around the mooring and taking out the end through the inside of the knot. We usually do two or three half-keys to stop a dead turn. This is a practical knot for fenders or for temporary docking.
– The Bowline
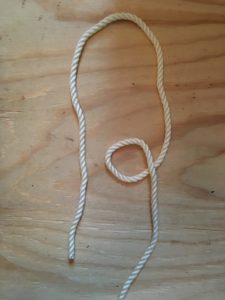
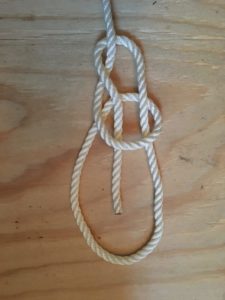
It is THE ultimate tying knot for mariners. It is very strong, elegant and not that difficult to do. To remember, just a little story: “The snake comes out of the well, turns around the tree and returns to the well.” In other words, we loop around a cleat or mooring point, on the longest part of the rope, we make a small loop in which the end of the mooring will pass (from below to above). The end of the mooring will then go around the longest part of the mooring underneath before returning to the previous loop.
10 – Mooring, Step by Step
For successful mooring, it means not too tight, but not too flexible and that keeps the boat a good distance from the dock and the catway. The best is to proceed in the following order:
1 – Hold the Boat
Ask a crew member to hold the boat on the side or on the bow.
1 – The Rear Spring Line
You have to start with the Rear Spring Line to make sure that the boat will not hit the dock.
3 – The Front Spring Line
Now you have to block the boat so that it does not back out of location.
4- Bow and Breast lines
To finish, you just have to stabilize the boat with the two bow lines and the breast line. If necessary, you can add one or two stern lines and you’re done!
I really appreciate your tip on how you can add a fender to the bow if you are afraid of it hitting the dock. My wife and I have been thinking of getting a new boat so we can take our family out on some trips to the lake next to our house. If we do get a boat, I will most likely get a fender for the bow since I don’t want any damage to happen at the dock!